By Mercedes T. of Busy B’s Bakery
Ingredients
For Cake:
- 1 cake mix (any flavor)
- Eggs (per cake instructions)
- Oil (per cake instructions)
- Water (per cake instructions)
For Buttercream:
- 2 sticks of butter
- 1 stick of shortening
- 8 C powdered sugar
- 1-2 tsp vanilla
- 1-2 tsp milk
- Gel food coloring (in desired colors)
- Chocolate chips for eyes
For Rice Krispies:
- 6 C rice krispies
- 3 Tbls butter
- 10 oz mini marshmallows
Supplies
- Pastry bags
- Leaf shaped piping tip
- Cake leveler (or a sharp knife)
- Knife for carving cake
- Scraper to smooth out buttercream
- 8 inch cake pans
- Cooling rack
- Gloves
- 10 inch cake board
- 10 inch cake box
- Dowels for stability (optional)
Want to make a super cool snake cake to wow guests at your next party? With a little creativity and a healthy dose of buttercream, you can make a snake cake of your very own! Just follow the instructions below:
Before you start, gather the ingredients and equipment you will need to prepare the cake. Make sure you have plenty of empty counter space for all of the cake’s components. Take out 2 sticks of butter and allow them to come up to room temperature. It is important that the butter be at room temperature when you make the buttercream or you will have a difficult time whipping it.
Begin by baking your cakes. Preheat the oven to 350 degrees. For this cake we used 1 box of store bought cake mix just to make the process a little easier. Follow the instructions on the box and pour your cake batter into 2 greased, 8 inch cake pans. Bake the cakes for the recommended time (each oven is different, so baking times may vary). To check the doneness of your cake, remove it from the oven and poke into the center of the cake with a clean toothpick. If the toothpick comes out clean (little to no cake bits stuck on), your cake is done baking and is ready to be cooled. If the toothpick comes out with cake stuck on it, it may need a few more minutes to bake. To check it again simply repeat the process with a new toothpick. Once your cakes are baked, place them on a cooling rack, in the pans for at least 30 minutes. After 30 minutes the cakes will have cooled enough to be removed from the pan. Remove the cakes from the pans and leave them to cool on the rack for an additional 30 minutes while you make the buttercream and rice crispies.
To make the buttercream, take 2 sticks of room temperature butter and add them to a large mixing bowl. If you have a stand mixer, it works perfectly for this process! Begin by whipping the butter with a mixer for about 2 minutes. Add in your stick of shortening and continue to beat the mixture until the shortening is well incorporated. Next you’ll begin adding in powdered sugar one cup at a time. Be sure that you don’t dump all the sugar in at once or you’ll have a powdered sugar cloud explode out of your mixer! And even though it tastes delicious, it does create quite a mess to clean up. As you add the sugar you’ll notice the mixture begin to thicken up and become fluffy. If you’d like a less sweet buttercream, simply add fewer cups of sugar. For a sweeter buttercream begin by adding in one additional cup at a time. The wonderful thing about buttercream is that the sweetness level is very customizable! Once you’ve added in your preferred amount of sugar, mix in 1-2 tsp of vanilla extract. If you’d like more of a vanilla flavor, 2 tsp is probably what you’re looking for, but again this is totally up to your taste buds. If the mixture becomes too thick you can add in a little milk to give the buttercream a smooth texture. Begin with 1 tsp and add more as needed to get the consistency you’d like. What you’re looking for is a buttercream that is light and fluffy, but clings to a spatula. This consistency makes the buttercream easy to spread on the cake, but stable enough that the scales on the snake standout instead of melting together. Once all of your ingredients have been well incorporated and your buttercream is the right consistency, cover the mixing bowl and refrigerate until you are ready to assemble the cake.
To create the head and tail of the snake you will need to make a batch of rice krispie treats to mold into the correct shapes. Begin by melting 3 tablespoons of butter in a large stock pot or dutchoven. When the butter is mostly melted, add in your marshmallows and stir the mixture until it melts and becomes smooth. Turn the heat off and add in your rice cereal 1 cup at a time. Adding the cereal in gradually allows it to be more evenly incorporated into the mixture. Once all of the cereal has been added, give it a few good stirs to make sure all of the cereal has mixed with the marshmallow. Pour the mixture into a greased pan and let it cool down enough to handle and shape. While the rice krispies cool, it’s time to level your cakes.
Leveling cakes is an important step in the process as it insures your cakes will be stacked evenly. Leveling can be done with a cake leveler, a tool available at most stores that sell baking supplies, or a simple chef’s knife. To level your cake, evenly cut the top off of your cake so that you have a flat, level surface. If you’re afraid that you won’t cut completely straight and may end up losing too much of your cake, you can use toothpicks to help guide you. Place the toothpicks around the cake (sort of like a crown) at the spot where you’d like to cut into the cake. This will help guide your knife as you cut.
Now that your cakes are leveled it’s time to start assembling and bringing your snake to life! You’ll want to take your buttercream out of the fridge at this point so that it can come up to room temperature. Take your cake board and position one of the cakes in the center of the board, this is the base of your snake. Next you’re going to frost the top of that cake with a layer of buttercream. The amount of buttercream you use depends on how thick you’d like the layer between your cakes. If you like a lot of frosting between the cake layers, go for it and add a good amount. If you don’t like too much, spread a thinner layer of buttercream. Once you’ve spread the buttercream over the first layer, take the second layer of cake and set it on top of the first frosted layer. You now have the beginning of your snake!
The next part of the process is where things start to get a little tricky and challenging, but don’t worry, you’ve got this! It’s now time to carve your cake into the snake shape. With a sharp knife you’re going to gently round out the sides of the cake so that it looks like two tires stacked on top of one another (or like a coiled snake). There’s no exact science to this, but a good rule of thumb is to cut small pieces and check the shape to see if it’s what you’re wanting. This can take a little trial and error, so don’t worry if it doesn’t shape up immediately, just keep working at it little by little until you get the desired shape.
Once you have your snake carved into your desired shape, it’s time to mold your rice krispies into a head and tail. The size of both pieces will depend on the shape your snake takes on. Luckily, rice krispies are easy to mold, shape, and reshape as you go along! To make the head, start by shaping a ball of rice krispies into a triangular wedge. Work the krispies until they become the desired size and shape for the head. To place the head on the cake, find the spot where you’d like the head to sit. To do this you may need to carve a small piece from the middle of the cake so your snake head sits flat and appears to come out of the coil. Repeat the same process to create the tail and place it in the desired spot on the cake. At this point you can place baking dowels or skewers into the cake for stability. This is not necessary, but if you are going to transport the cake on rough roads it may be a good idea to add some extra stability to the layers.
Now that you have the snake assembled, you’ll want to crumb coat your cake. Crumb coating is the process of adding a thin layer of buttercream to the cake that acts as a barrier between your final layer of buttercream and the crumbs that come off the cake during the frosting process. To do this, add a thin layer of buttercream all over the cake and smooth it out as much as possible. Don’t worry if the cake crumbs mix into this layer, we’ll cover them with snake scales later. After the crumb coat has been applied, refrigerate the cake for a minimum of 30 minutes to help the cake firm up before decorating. You can also refrigerate overnight as long as the cake is covered or in a box to prevent drying out.
Once your cake has chilled, it’s time to start decorating! Color the remaining buttercream the desired color(s) of your snake. Begin by adding a few drops of gel coloring until you reach the desired color. Take your colored buttercream and add it to a pastry bag that has been fitted with a small leaf shaped piping tip. The leaf shape becomes a perfect scale when piped onto the cake. You can practice a few test scales on a plate before beginning to decorate the cake if you feel more comfortable testing it out.
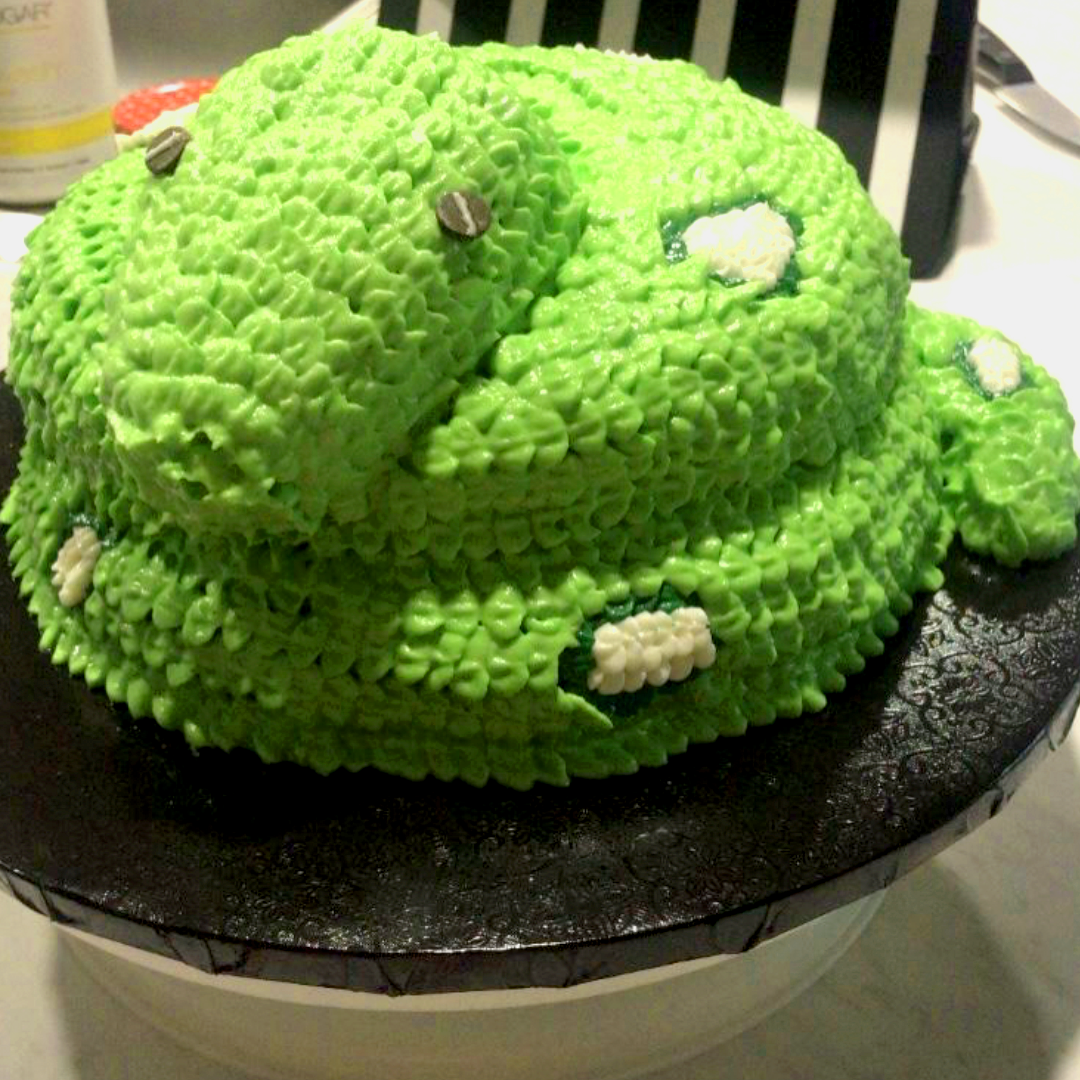
Now comes the fun part! Starting at the bottom of your cake, pipe scales one by one until you have covered the entire snake. You’ll want the scales to mirror a real snake, so it may be helpful to look up a few reference pictures before you begin. This process is very time consuming, but the end product is definitely worth it!
After you’ve piped on the scales, your snake will need some eyes. You can simply add chocolate chips or you can buy edible eyes from your local baking shop (Joann’s and Michael’s usually carry these as well). Place these on your snake’s head and you’re almost done. Finish up the cake by cleaning any extra buttercream off of your cake board and your snake is ready for your next safari!
Thank you to Mercedes at Busy B’s Bakery for the amazing recipe. Need a cool Safari cake? Click here to contact them.